1-Ai-POS Guide - Edit Menu-Add Surcharge_08-09-2020

Written by Vladimir Bigdan
Updated at May 25th, 2021
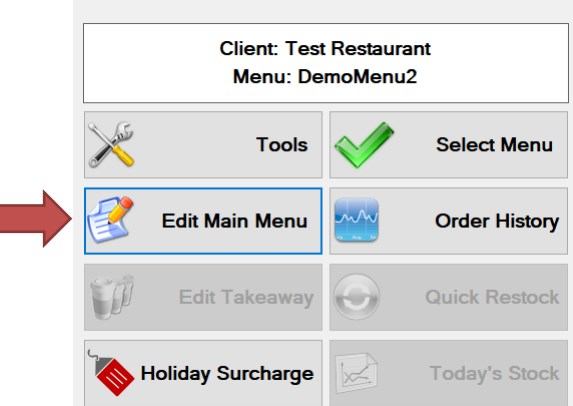
To commence menu edit, press “Edit Main Menu” from the Ai-Admin app and enter your PIN code. This will open the menu editor:
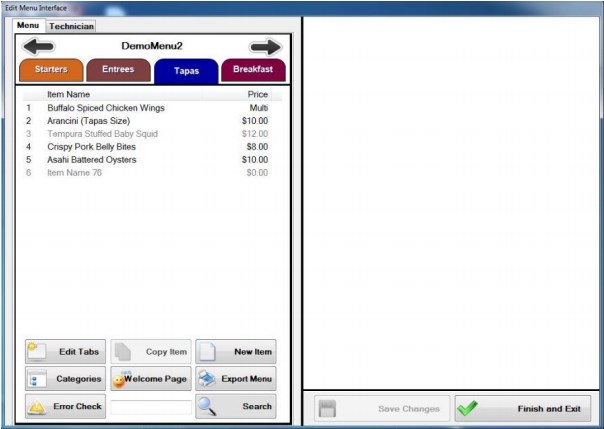
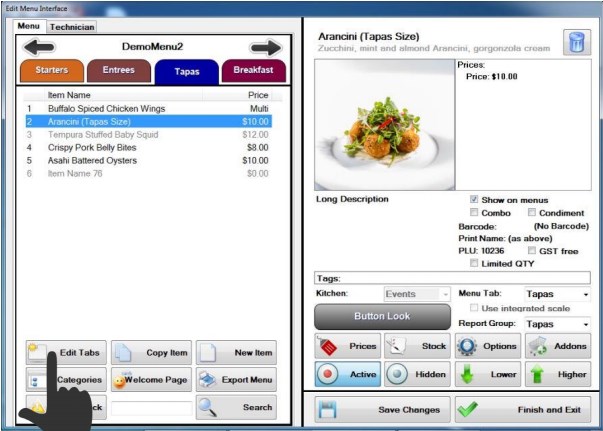
Press on any menu item from the left hand list to bring up its details:
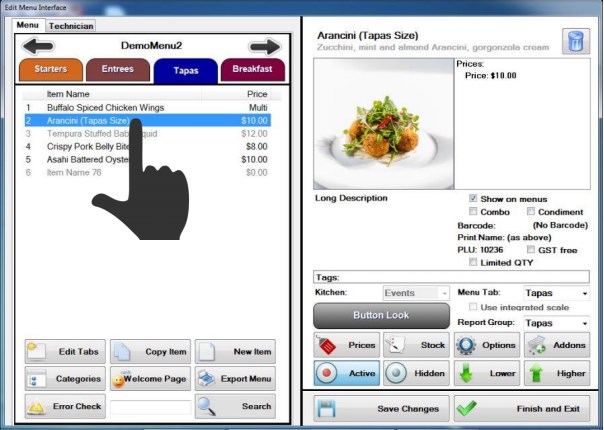
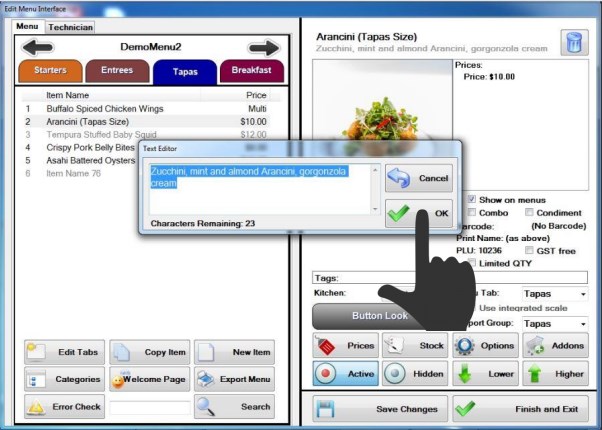
To edit the Name, Short Description or Long Description, press on the text required to be changed:
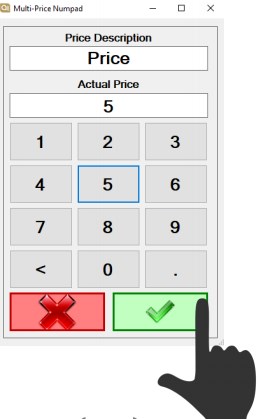
To change the price of a menu item, press on the price and enter new price in the popup window:
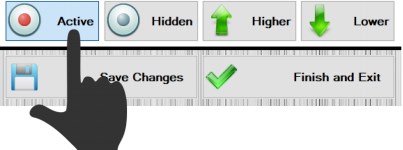
To activate or hide the menu item on the tablets, press the relevant status button:
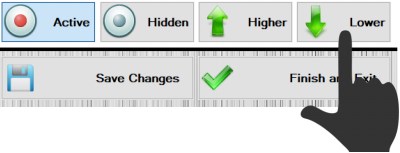
To change the order of menu items in the list, press the Higher / Lower button as required. You will see the menu item change position.
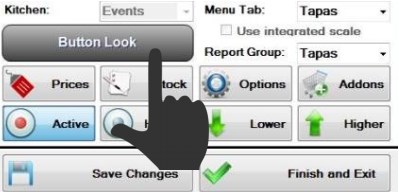
To change the colour of the button to be displayed on the POS, press on the “Button Look” button. This shows how the button will look in the POS:
This will bring up a colour selector where you can select button and text colours.
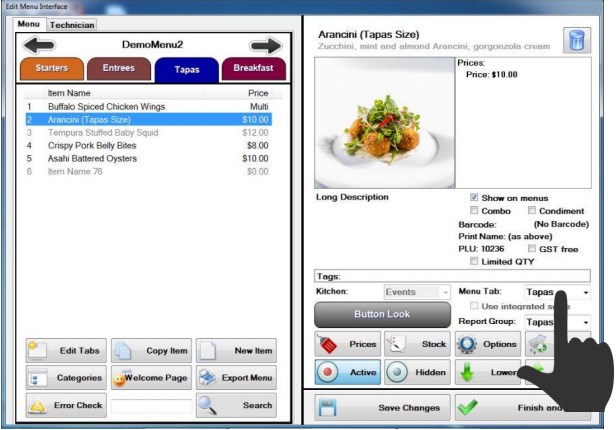
To move the menu item to a different tab, press on the dropdown menu, located above the Higher/Lower buttons:
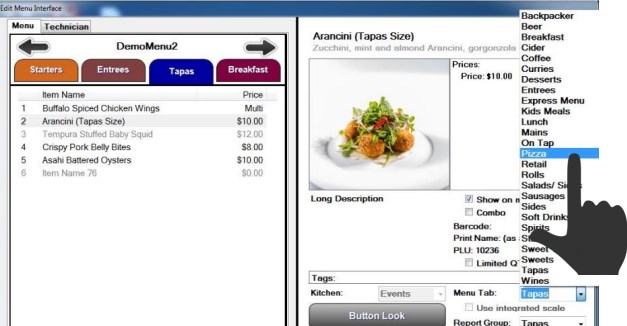
This will bring up a list of all tabs. Select the tab you wish to move the menu item into:
To create a NEW item, press on the “New Item” button:
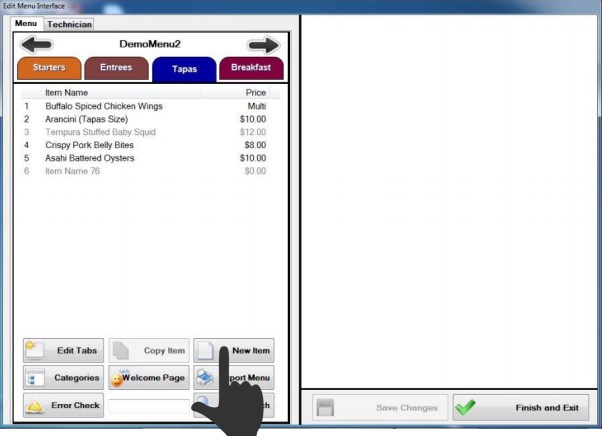
Then press on this new item to modify the descriptions. By default, any new item is hidden. To activate it, press “Active”.
To set or change the questions to ask the customer, press on the “Options” text:
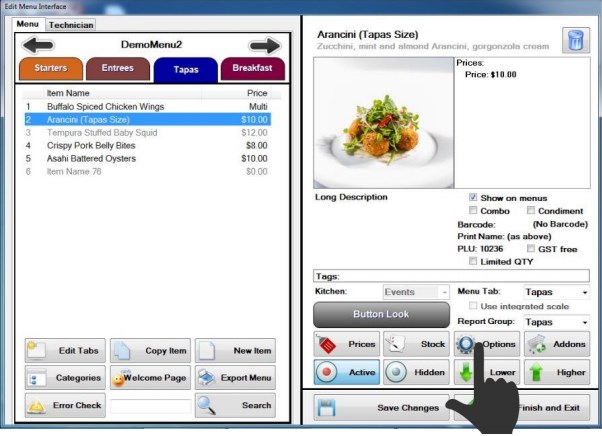
This will bring up the Meal Options control window:
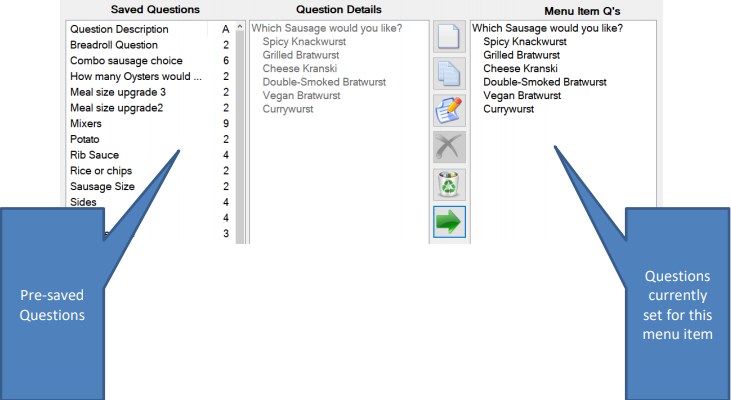
In the Meal Options control window, you can:
- View the saved questions or create a new question
- Remove a question from the menu item
- Add a question to the menu item
- Description: anything you like to describe to you what the question is
- Question: actual question to be asked to the customer
- Answers: up to 16 possible choices for the customer to select. You can also add surcharges to each answer.
Please Note: the selected Answer will be printed on your docket – so make sure you write something meaningful. For example, “Yes” is too ambiguous, however “Yes, GF please” will indicate a GF choice.
To edit the tabs on the menu, press on “Edit Tabs” from the main control window:
This will bring up the Tab Control window:
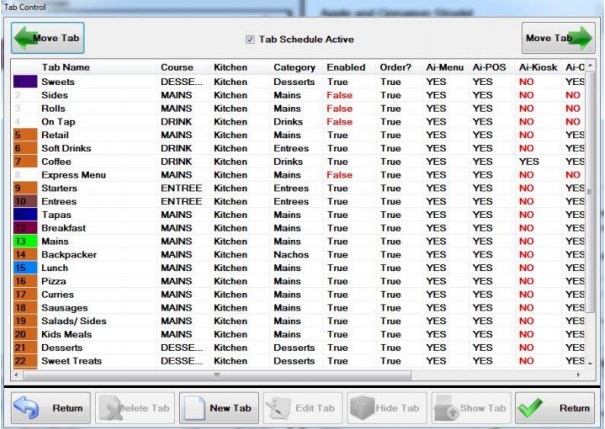
From this window you can:
- Move a tab right or left in the order
- Create new tab
- Delete an existing tab
- Edit the tab’s descriptors
- Hide/Activate tabs manually OR select the Auto-Scheduler activation.
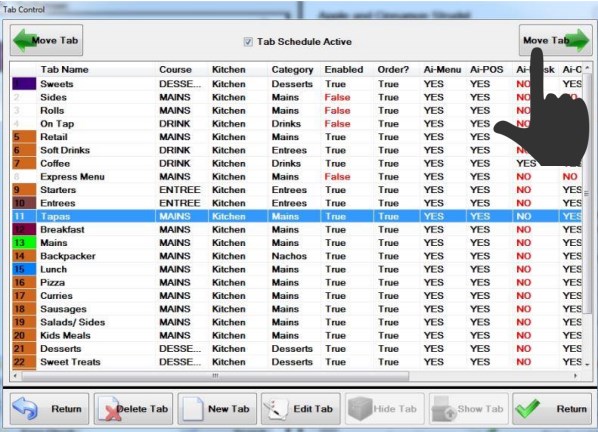
To move a tab right or left, select the tab and press the relevant “Move Tab” button:
To edit a tab, select the tab and press the “Edit Tab” button. This will bring up the following window:
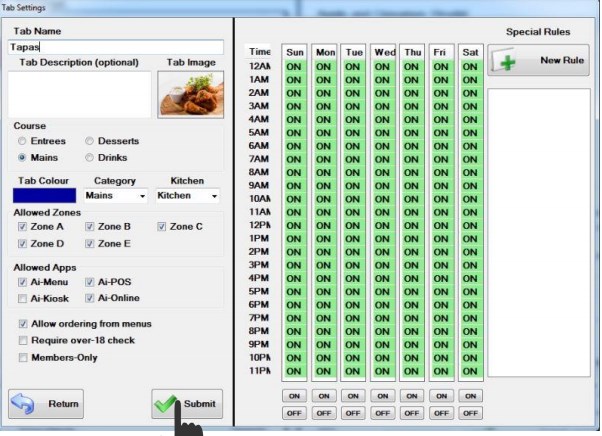
- Tab Name: name of tab
- Tab Description: optional text you can write to explain your tab on the menus. For example “this is our gluten free menu”.
- Tab Type: dictates how the child menu items of the tab will be classified. This is important for two reasons:
- Sets up where menu items will be printed (if you have different printers for different stations)
- Selects where the items will show on the tablets – under “Food” or “Drinks”
- Select Kitchen: if you have multiple kitchens you can select where this item will print
- Select Zones: if you use multiple zones, you can select if an item will show on menus of a particular zone
- Tab Colour: on POS screen this indicates the colour of your tab
- “Allow Ordering” – whether the tablet menus will show the “order” button
- “Show on tablets” – this will hide the tab from the tablet menus BUT will still allow ordering from POS (or menus in staff mode)
On the right-hand side you will see a scheduler table. If the auto-scheduler is active, you can select when the tab is active but pressing on any time slot – this will toggle between “ON” and “OFF”. You can also make a while day on or off by pressing the relevant button on the bottom of the day.
Please Note: Deleting a tab is only possible if there are no menu items under that tab. If you wish to delete a tab with menu items, you must first move those items to a different tab (and hide them off the menu if required).
Remember to save the changes!
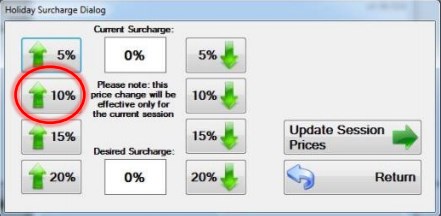
To add a holiday surcharge:
To add a holiday surcharge you must go to the Admin screen and press the Holiday
Surcharge button.

The next screen allows you to select a pre-set amount or you can enter another amount manually into the “Desired Surcharge” field.
With the correct surcharge entered you must now press the “Update Session Price” button. This will change the price of all items for this trading session only. If you require the surcharge for the next day then you must repeat this process.
DO NOT press the “Update Permanent” button unless you want to raise or lower your prices permanently.
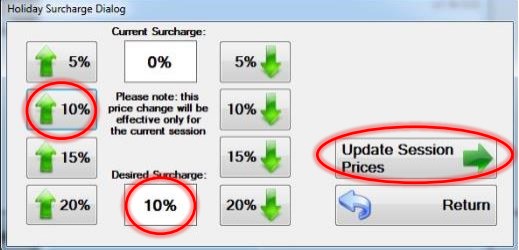
The POS will automatically return to the normal price at the end of the current session.

Pizza changes
To set the setting to print “unpaid” on the docket, go to Admin->Tools->Printing->Takeaway and check the box “Print “UNPAID” on docket”
- Automatically decodes the table number from the quick order comment and if it’s an integer it prints as a dining order.
- Please enable this feature in Admin-Tools-Printing-Takeaway
- Not print “no” in options
- Fixed bug in “delivery” printing
- Changing course item now prints as such on both docket and shows on screen
- Default takeaway pickup ASAP
- Please change default waiting time to 0 mins
- Re-order dining items feature: press “edit table” and you’ll see a new button “reorder items”
- Docket print job number prints optionally
- Please enable setting in Admin-Tools-Printers-Dockets
- You can now select which takeaway buttons you want shown.
- Drive-Thru, External Delivery and Internal Delivery are all selectable in
Admin-Tools-Config-AiPOS-Takeaway
- Drive-Thru, External Delivery and Internal Delivery are all selectable in
For future reference, new checkbox is in Printers -> Takeaway and called “Print takeaway details on top of docket”.
Print total bug fixed.
Issue with printing invoice on kitchen printer fixed: feature was de-selected, and checkbox moved to Printers -> Takeaway called “Print unpaid order invoice from kitchen printer” Quick order descriptor issue is actually fine, the but requires a quick order type for operation.
NZ PCeftpos (Nitro)
- You can open PC-EFTPOS/Nitro control panel by going to Ai-POS -> (Press on logo) -> Setup -> Ai-POS. There will be a button called “Nitro EFTPOS”. Assuming PC-eftpos is installed on the machine that button will open the control panel.
- Optionally PC-EFTPOS logo is removed by setting in Ai-Admin -> Tools -> Config -> Admin -> System. Checkbox “Show PC-EFTPOS logo”. Enabled by default.